Sunday, July 15, 2012

Beetroot Hummus


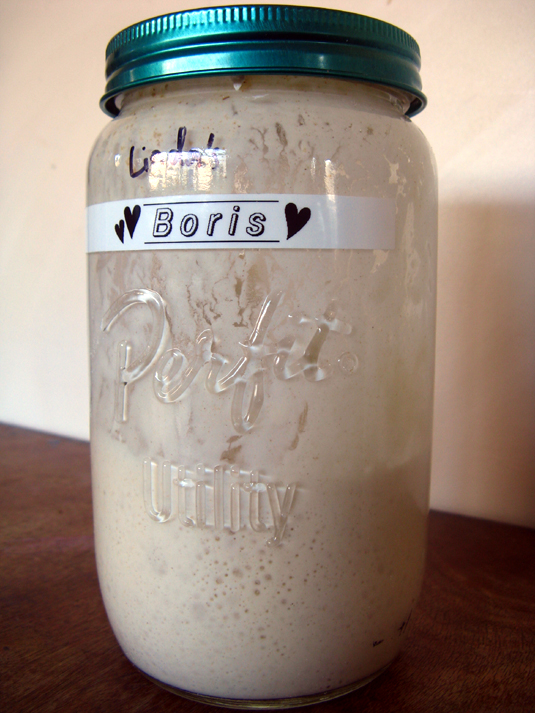
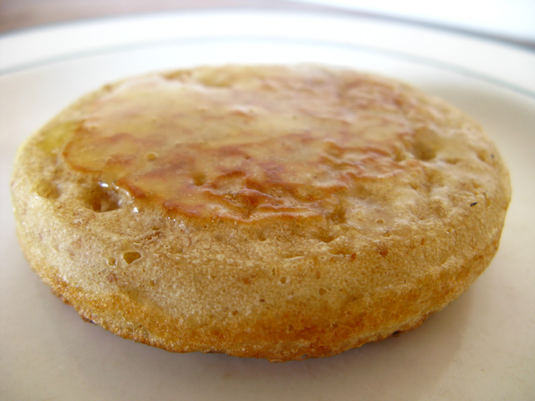
Since we've been on our sourdough bread baking frenzy I can barely remember the last time we actually bought bread from a store. It's been so fun getting back to basics and making this household staple ourselves. My husband has even been more enthusiastic than I have, preparing the dough in the evenings then getting up early to bake it. He'd never even baked before, let alone baked bread, and now he has produced countless wonderful loaves, and they are getting better all the time. One more step towards living the "Good Life".

So with all this bread in the house we thought we better rustle up some spread or dip. Hummus is a favourite of ours, so we thought we'd try a twist on it, and make beetroot hummus for a change. Even though I love beetroot I was worried the flavour might be too earthy for a dip, but I was wrong. Beets impart a lovely flavour and mild sweetness, not to mention a pretty colour (come on, how rad is that pink!). It's a tasty addition and any health benefits are an added bonus. Just add cooked beetroot to your regular hummus recipe before you whiz it up. You can even use tinned beetroot if you don't have fresh. If using fresh beetroot just wrap them in tin foil and roast them at 180 Celsius for about an hour, then let them cool then peel with a vegetable peeler.

This is the basic recipe I use, but feel free to add ingredients like tahini or toasted nuts (like walnuts or pecans) to jazz up your hummus even more. Taste as you go and customize it. The beetroot hummus can be used in any of the ways you ordinarily like to use hummus, it goes great in wraps and sandwiches or with kebabs or just as a simple dip.

Enjoy!

p.s: I am entering this recipe into the LeaderBrand competition to celebrate the launch of their ready-to-serve beetroot. I thought I'd enter this older recipe as I make it so often and have been doing so for years, it's a definite favourite of mine and their new ready-to-serve product would be ideal to use in this recipe. Anything that saves time in the kitchen is a bonus!


BEETROOT HUMMUS


Ingredients:

2 roasted and peeled beetroot (approx 200gms cooked beetroot)
400g cooked chickpeas (tinned is fine, just drain them)
1 teaspoon cumin powder
3 cloves of garlic, chopped or crushed
Juice of a lemon
A splash of olive oil

Method:

Just whiz everything together in a food processor or blender etc. 
Easy as that!

Makes approx 600ml

Friday, June 29, 2012

Adventures with Wild Yeast Sourdough

My first ever sourdough bread.


Living here at a camp in the middle of the forest we tend to live a more communal lifestyle. We often have pot-luck dinners, help each other out with projects, that sort of thing. It's almost like living in a small community of its own.

I named my starter "Boris".

This also means ideas can spread quickly. So 2 weeks ago when one of the backpackers here made a simple comment that they'd like to make sourdough, it wasn't long before a whole bunch of us jumped on the bandwagon and we all decided to give it a whirl. And now we are officially obsessed. The staff room is littered with jars full of sourdough starters bubbling away, and all we ever seem to talk about is air temperature and flour to water ratios; it is more like a science lab than a tea room.


In case you didn't know, sourdough is made (at least in this case) without the use of commercial yeast. To put it very simply: you make a little mixture of flour and water (known as the starter or levain) and let it sit in a warm spot, you also feed it regularly with more flour and water. Slowly the wild yeast spores (from the air or in the flour itself) will become activated in your concoction and bubbles will appear and the mixture will also start to smell fruity and sour. That's when it's good to go. So then you just use some of the starter as a base for your bread, and you just add more flour or whatever else you like to create your bread. As well as being a fun process, homemade natural sourdough tastes really delicious and will have a distinctive taste, bread will also be cheaper to make because you wont need commercial yeast. The starter can also be maintained in your fridge so you can just use it at will.

Sourdough starters can also be used to make other things like pancakes (I can attest to these being awesome, they are extra soft and tasty) and I've also made crumpets with it (see photo below), they were yum but fiddly to make. Other favourite uses are pizza dough and I even successfully used sourdough to make a chocolate cake! Delicious! (Though I'm tweaking that recipe to get it just right.) Watch this space!

Crumpets, one of the fun things you can do with your sourdough starter.


I could go into huge depth about the ins and outs of making sourdough, but then this post would turn into a novel. So if you're keen to learn more about it here are a few links to recipes I've used, but be warned you may turn into a sourdough nerd like me! Or if you are already sourdough obsessed, feel free to drop me some comments about what you love to make with your sourdough starters or any recipes or hints or tips.

Link to the sourdough starter recipe I used.

Link to the sourdough bread recipe I most often use.

Link to the crumpet recipe I used.


Edit: It has now been 2 months and we are still obsessed with sourdough and our breads are looking (and tasting) better than ever. We've tried several new recipes so I thought I'd share some of my new faves that I have been making repeatedly with great success:

Link to sourdough chocolate cake recipe. (A really moist and yummy cake, and I don't even like choc cake!)

Link to sourdough bagel recipe. (By the way I make this by hand, you don't need a mixer)

Link to sourdough pizza crust. (I don't use a bread machine, I just mix it by hand then rise it for a few hours for the 'first rise' before dividing and rolling.) Works well.

Sunday, June 17, 2012

Dark Rye Bread, and snow!


The past couple of weeks have been pretty cool. And I mean that quite literally. We had a huge dump of snow here in Hanmer Springs. 

I've never lived anywhere where it has snowed before (the tiny sprinkle we had in Timaru doesn't count) so I've been super excited. It was such a novelty for me that even shovelling snow became a fun experience. 

"Everyday I'm shovelling"


 It really has been a winter wonderland here, and every morning waking up and heading out the door I felt like I was in a dream. It has been amazing. But...it also has been super cold! Great weather for soups and home-made bread. 

A bread I especially love is rye bread. It's so hearty and tasty, and seems to compliment winter soups so well. Here's the base recipe for the rye bread I enjoy making, but feel free to add any spices like caraway or ground cardamom if you want to add some extra zing. I hope you are enjoying winter as much as I am!

Ingredients:

3 teaspoons active dried yeast
1 & 1/2 cups warm water
2 tablespoons golden syrup
2 tablespoons oil
1 & 1/2 teaspoons salt
2 cups of high grade flour
1 & 1/2 cups rye flour
2 tablespoons cocoa powder
1 teaspoon instant coffee powder
optional - 1 teaspoon of spice, I recommend either caraway seeds or ground cardamom

Method:

Add the first five ingredients to a bowl. Add one cup of the high grade flour. Mix well, then cover the bowl and let it stand in a warm place for about 15 minutes.

Stir in the rest of the high grade flour along with the rye flour, cocoa powder, coffee powder and any spices you wish to add. (add extra flour or water as needed to make a dough to knead.)

Knead dough for about 10 minutes. It should become more elastic and spring back when touched.

Cover and place in a warm spot for about 30 minutes.

Knead again for only a minute ,then using floured hands pat the dough into a smooth ball shape.

Place onto a lightly floured baking tray and let it sit in a warm spot again for about an hour.
 
Bake at 200 Celsius for approx 30 minutes.

Thursday, May 17, 2012

Hummingbird Cake, and a wedding.

I've been absent from my blog for a wee while. My excuse is that I had other things on my plate; a new town, a new job, and a new husband. Well, "new" in the sense that I've never had one before. So yeah, I got married! Last weekend!


It turned out to be a fun and relaxed day. It wasn't expensive or elegant, but it had personality and was just what I'd envisioned, and more. 

To keep costs down I'd decided to do most of the decorations and planning myself, with the help of friends and family of course. I had the dinner catered but with a bevy of friends (who are keen bakers) I decided to do a dessert table. One of my favourites were these cookie monster cupcakes made by my talented friend.


For some stupid reason, I decided to make my own wedding cake. I say stupid because even though I enjoy baking, it's probably not something you want to fuss around with when you have other things to organise in the day or two before your wedding day. That said, I was not making a huge cake and was using a "no fail" recipe". So everything did turn out 'alright on the night'; literally; I was baking this at 9pm two days before the big day. It was actually quite fun, and it felt quite rewarding to have contributed something to the feast.

My cake. Simple but delicious.
Hummingbird cake is a  banana and pineapple cake with a hint of cinnamon and pecans. The flavours are balanced very well and none are over powering, it is the kind of cake that could have general appeal. This particular recipe I used is adapted from a Martha Stewart recipe, and doesn't require too much faffing around. It can be made a couple of days ahead and actually improves in flavour, and will cut easily into 12 wedges but will serve heaps more if you cut into 'squares'.

Ingredients

For the cake:

Nonstick vegetable spray
Plain flour, for pans
3 cups self-rising flour
2 cups sugar
3/4 cup vegetable oil
1/2 cup finely chopped pecans
2 very ripe large bananas, mashed
1 x 250g can crushed pineapple, with juice (use the juice)
1 teaspoon pure vanilla extract
1 teaspoon ground cinnamon
4 large eggs, beaten

For the frosting:

450g icing sugar
230g cream cheese, room temperature
85g unsalted butter, softened
1 teaspoon vanilla extract
1 tablespoon milk, or more if needed
A couple drops of food colouring if desired
Option: use 1/2 cup chopped pecans for decoration
Or use sugar flowers as I did (I cheated and bought mine ready made)

Method:

Preheat oven to 160 Celsius. Spray and flour three 8-by-2-inch round cake pans, tapping out excess flour; set aside. (You can also just use one pan, just clean and re-use it after baking each layer.)
Prepare the cake; in a large bowl, stir to combine self-rising flour, sugar, oil, pecans, bananas, pineapple, vanilla, cinnamon, and eggs.
Divide batter evenly between prepared pans, smoothing with a spatula. Bake, rotating pans halfway through, until the tops spring back when gently pressed with your fingertips, 26 to 28 minutes.
Transfer pans to a wire rack to cool 10 minutes. Invert cakes onto wire rack. Re-invert cakes and let them cool completely, top sides up.
Prepare the frosting; in the bowl of an electric mixer fitted with the paddle attachment, combine sugar, cream cheese, butter, vanilla, and 1 tablespoon milk on medium speed until frosting is smooth. If needed, add more milk, 1 teaspoon at a time, to achieve the proper spreading consistency.
Using a serrated knife, trim tops of cakes to make level. Place four strips of parchment paper around perimeter of a serving plate or lazy Susan. Place the first layer on the cake plate. Spread the top of the first layer with 1/4 of the frosting. Place the second layer on top and repeat process with another 1/4 of the frosting. Place the remaining layer on top of the second layer bottom side up. Spread entire cake with remaining frosting. If desired, sprinkle the top with pecans. Remove parchment paper strips; refrigerate until ready to serve.

Adapted from a recipe by Martha Stewart.


-Photos courtesy of Shalane Hopkins

Sunday, March 11, 2012

Wild Hare Braised In Beer


My life has kind of changed recently. My boyfriend finished his studies and got his first job in Outdoor Education. We had decided we'd move to wherever he found a suitable job. So now here we are living in a new town, Hanmer Springs. It's not too far from where we used to live in the South Island, four hours away, but our lifestyles have changed a lot. We're no longer living in the city, we're living amongst a forest camp nestled in an exotic forest. 

Even though I've been here a month, I still find it a novelty to have a forest on my doorstep. After work I can go out and pick wild blackberries and cherries,  go hunting, attempt one of the many mountain bike tracks, go mushroom spotting (not confident enough to pick them yet), or just generally commune with nature and say hi to my buddies the fantails. It's also been great getting to mix with all the travellers that move through the place. I've made crepes with a French woman and apple strudel with a German, I guess food is a universal language. It's also a universal currency too; I let a customer borrow my salt and pepper, and he paid me back in whitebait fritters. They were delicious.

Speaking of delicious, I guess I should get back to today's recipe. It features hare. Now I'd never eaten hare before, but I'd had rabbit and enjoyed it and expected it to taste the same. I was wrong. The hare had a more subtle taste, less gamey, and was much more tender. I'd now pick it over rabbit any day. I guess it's probably not something you'd come across very often (unless you hunt or know people who do), but it's great option if you're into eating bunnies. They are a pest after all!

Ingredients:

A few rashers of fatty bacon
1 hare, cleaned and jointed
Salt and pepper
3 tablespoons flour
2 onions cut into wedges
Sprigs of fresh herbs
1 cup of beer
1 tablespoon wholegrain mustard
1 teaspoon brown sugar

Method:

Cut bacon into pieces, lay them in a roasting pan. Put it into an oven preheated to 200 Celsius. Cook until done, remove the bacon and set it aside. Leave the bacon fat in the roasting tray.
Season the hare with salt and pepper then toss in flour until coated. Place the hare in the roasting pan, coat the pieces in bacon fat. Add the onions and fresh herbs.
Place tray in oven and cook for 15 minutes, turning once or twice.
Mix beer, mustard and brown sugar and pour into the pan.
Lower heat to 180 Celsius, cook for another 30 minutes, baste frequently.
Serve as is, or you can make a gravy using the pan juices. To make gravy I just heat the pan juices in a saucepan. Then I mix a tablespoon of flour with a tablespoon of butter to form a paste, and drop in blobs of the paste to the saucepan, making sure to whisk thoroughly.

Serves 4